Ballot Builder Groups
Here's how to build or edit a Ballot with Contestants placed into Categories and Groups
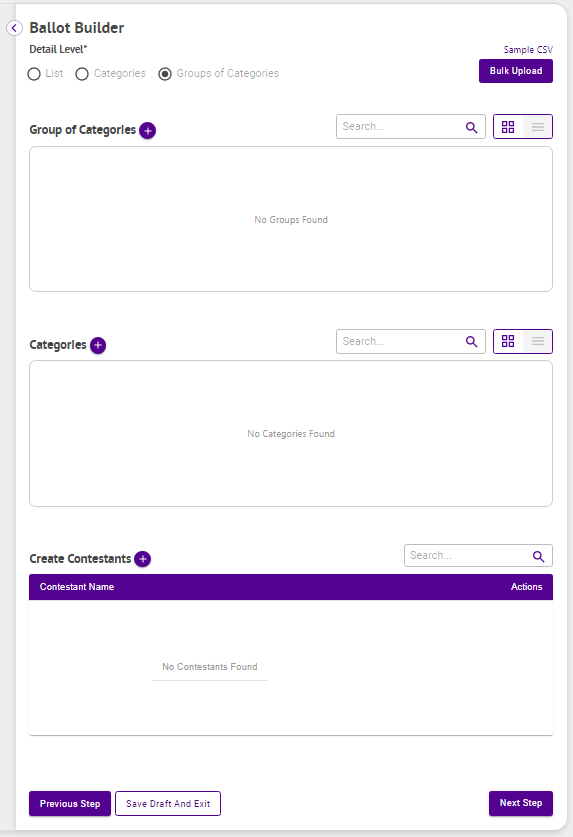
At this point there are two ways to build your ballot. You can create your Groups, Categories, and Contestants manually or you can choose to Bulk Upload them via a CSV file. Expand each option below to learn more
Bulk Upload
- Click Sample CSV just above Bulk Upload to download a sample CSV file based on your selected Detail Level

- Open the sample CSV file replacing the default information (G1, C1, E1, and Default Address) with information specific to your ballot where G is the group name, C is the Category name, E is the contestant name, and Default Address is the contestant's address
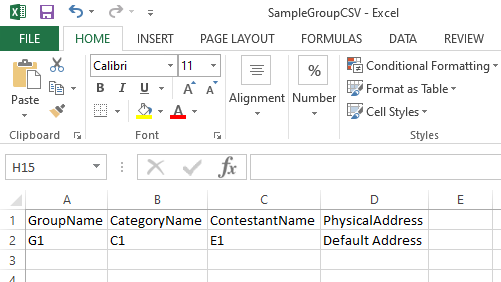
- Add in all of your additional Group, Category, and Contestant information
- Save your CSV file
- Click Bulk Upload
- Click Upload
- Browse to your upload file
- Click Open
- Click Create
- Click Next Step

Create Manually
Groups
- Click the + next to Groups to input a Group

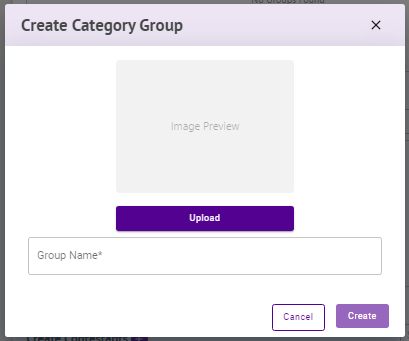
- Enter a Group Name
- Click Upload to optionally upload an image
- Click Create
- Repeat creating Groups as needed
Categories
- Click + next to Categories to input your Categories

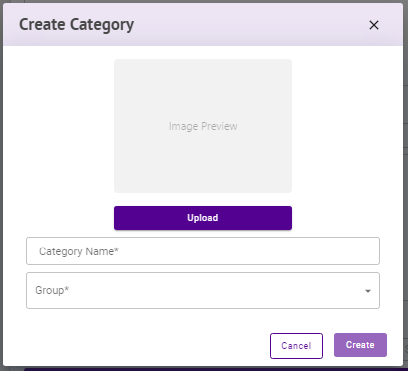
- Enter a Category Name
- Select a Group for the Category
- Click Upload to optionally upload an image
- Click Create.
- Repeat creating Categories as needed.
Contestants
- Click + next to Contestants to input your Contestants

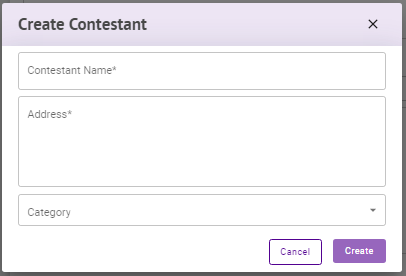
- Enter your Contestant Name
- Enter the Contestant's Address
- Select a Category for the Contestant
- Click Create
- Repeat creating Contestants as needed
- Click Next Step
Groups
- Hover over the Group in question
- Click the pencil icon in the upper right of the Group

- Edit the Group Name
- Click Upload to optionally upload an image
- Click Update
- Repeat updating Groups as needed
Categories
- Hover over the Category in question

- Click the pencil icon in the upper right of the Category
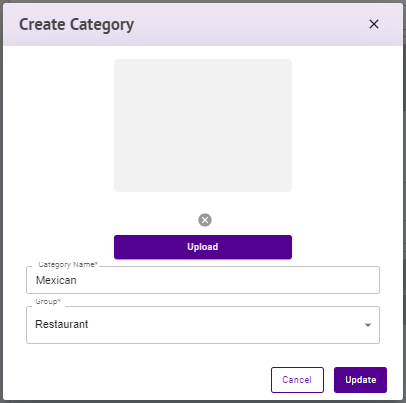
- Edit the Category Name
- Select a different Group for the Category
- Click Upload to optionally upload an image
- Click Update
- Repeat editing Categories as needed
Contestants
- Click the pencil icon to the right of the Contestants name under Actions
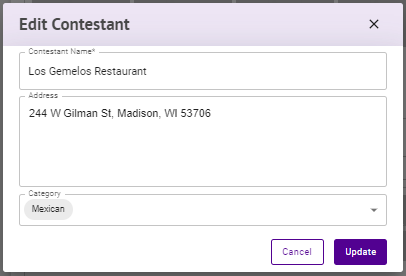
- Edit your Contestant Name
- Edit the Contestant's Address
- Select a different Category for the Contestant
- Click Update
- Repeat editing Contestants as needed